Monday, 15 September 2025

How to overcome BIP Report Payload limitation for data larger than 10 MB

 This blog covers the size payload limitation while calling BIP report from Oracle Integration cloud. When you’re calling BIP report via Public Report Service, you will not be able to download Payload more than 10 MB of size. Click Here 

Let’s understand the above with a Business Scenario: 

 You have a large government council, and they are posting data from different modules like GL, AP, AR, Payroll to SLA (Subledger Accounting). Millions of journal lines are being posted every day and some of the information including the Chart of Accounts must be sent across Third-party supplier for their reconciliation. As a part of the activity, we need to fetch all the million lines from SLA tables to supply back to Third-party Systems. In this scenario, your data volume is far higher than 10 MB and you will often see payload limitation errors. 

There are couple of options which you can use to overcome this limitation: 

  1. Create ESS Job which will burst your output to SFTP location and read data from SFTP in segment from your Integration. 
  1. Use Content Manager (UCM) as a delivery option for your BIP output and read data in chunk from UCM using ReportFileID. 

In this article we’re going to use second option as it’s quite easy to implement and manage. 

Prerequisite: 

  1. Please refer my earlier blog which will describe “How to call BIP report in Oracle Integration Cloud”. 
  1. Update BIP Report Mapping 

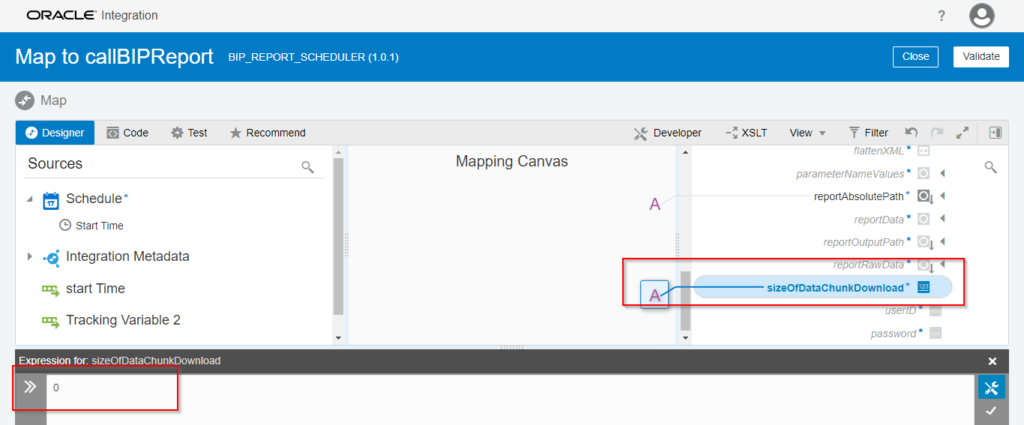
Update BIP Report Mapping and provide sizeOfDataChunkDownload as 0 instead of -1. 

If you’re passing sizeOfDataChunkDownload as -1 it will return all the data back to the client, to avoid this scenario pass 0 instead of -1 it will generate the output file in UCM server and will return the report ID to fetch data in chunks. 

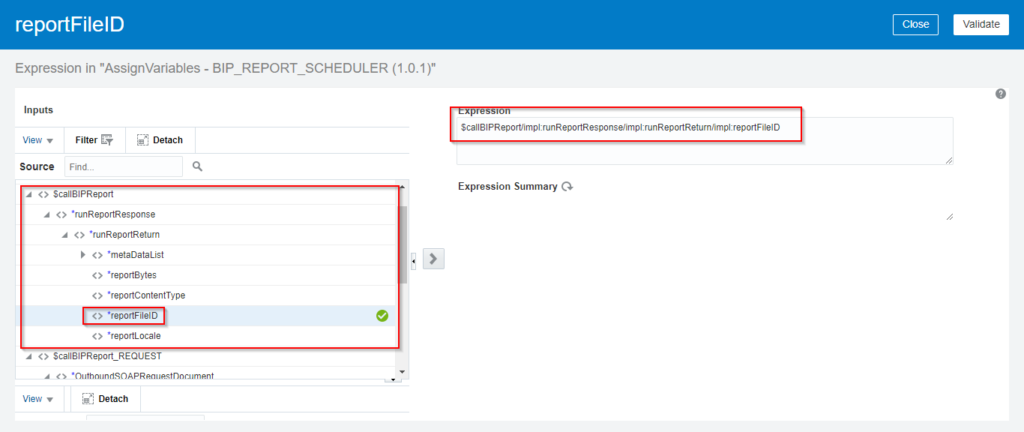
callBIPReport response will return Report File ID using which you can download data in chunk from UCM. 

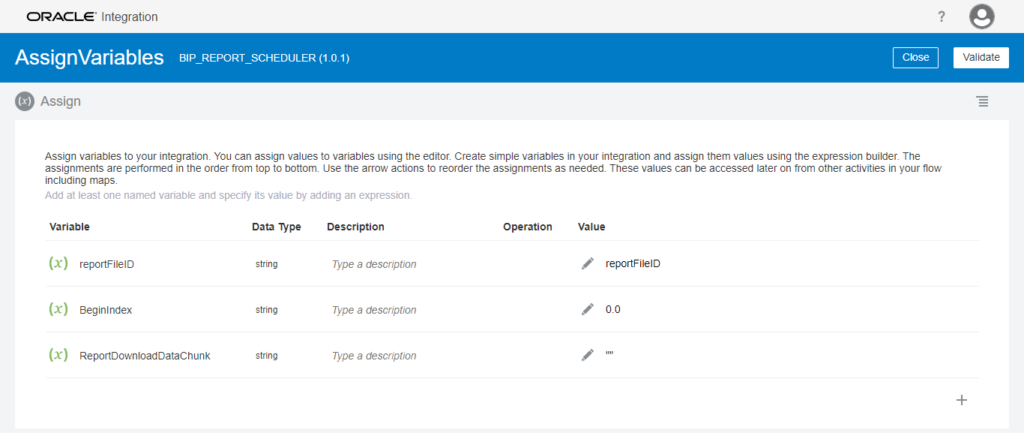
Assign reportFileID to some variable for future use and create two more variable  

  1. BeginIndex with value 0 
  1. ReportDownloadDataChunk with value ‘’(blank String). 
  1. reportFileID : callBIPReport à runReportResponse à reportFileID 

Now you have assigned all the parameters with appropriate value.  

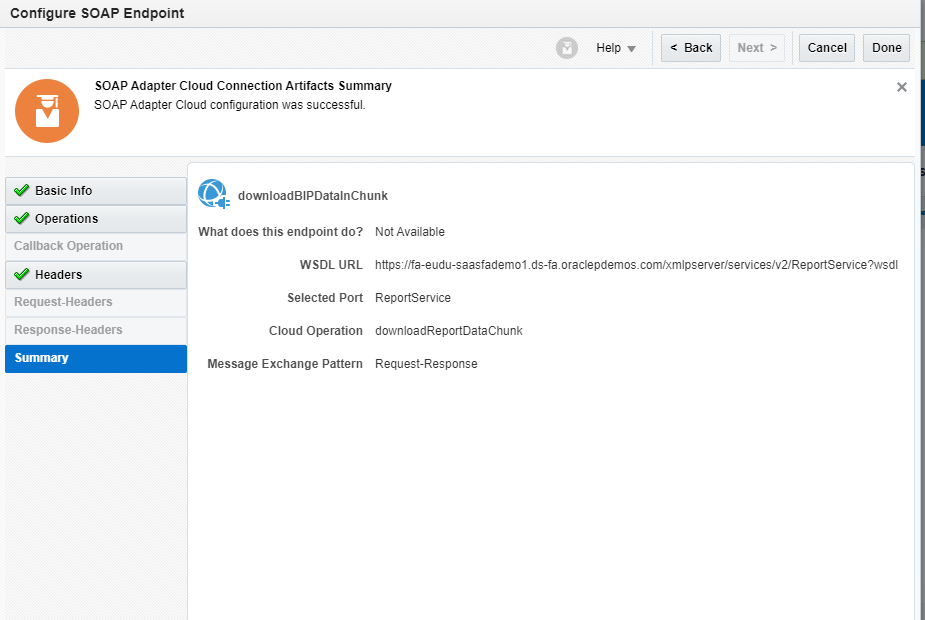
In next step we will call downloadReportDataChunk operation from PublicReportWSSService to download data in chunk. 

  1. Call downloadReportDataChunk Operation 

We need to call this operation until there is no data remaining to fetch. To implement this logic, we need to call this operation into the while loop, which will execute until begin index is -1. 

  • Implement While loop in Integration 

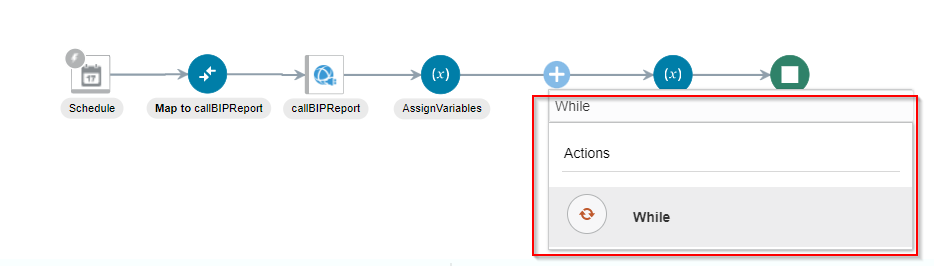
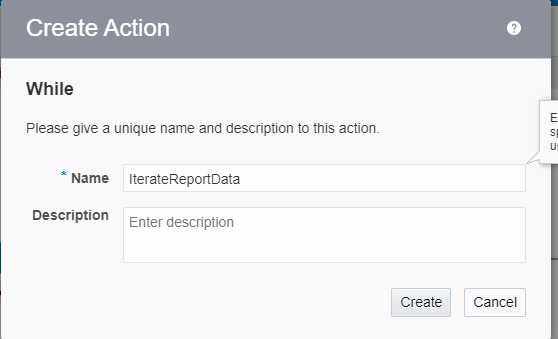
Once you click on Create button, it will open mapping page where you need to provide exit criteria for While loop in New Condition section. 

Condition : BeginIndex != -1 

Note: You have defined BeginIndex in Step 1. 

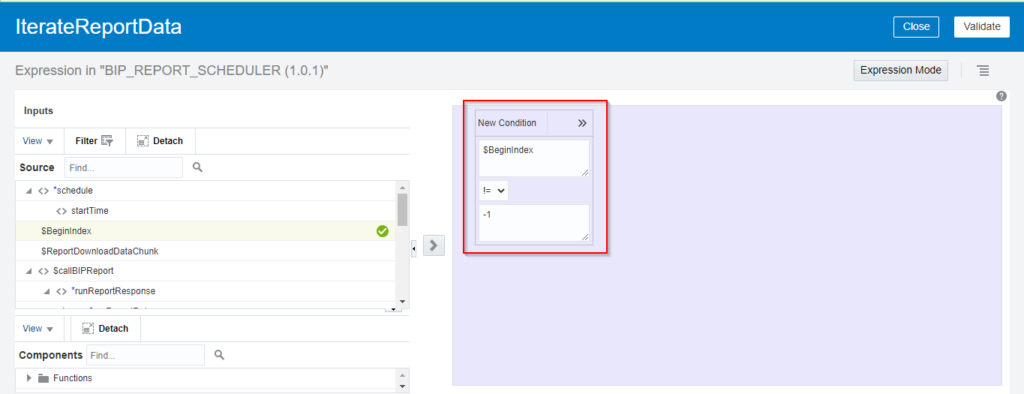
Click on Validate and Save your Integration. 

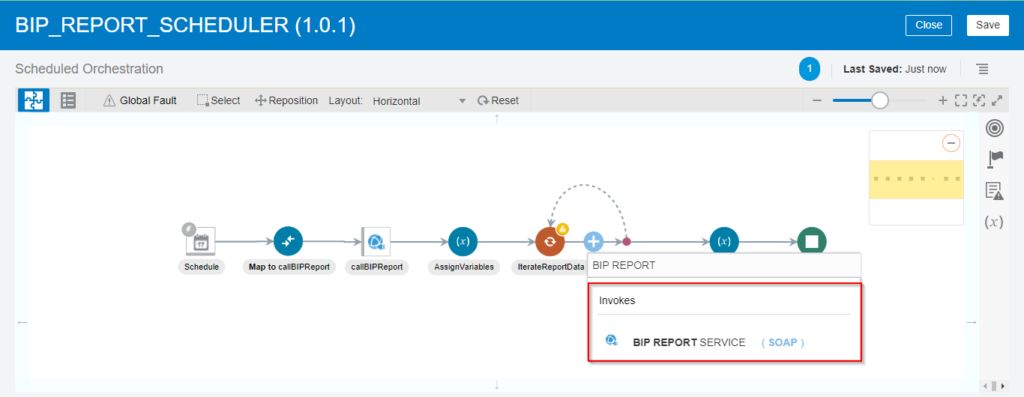
  • Call downloadReportDataChunk operation in Loop. 

Invoke BIP Report Connection created in “How to call BIP report in Oracle Integration Cloud” Step 1. 

  • It will open on wizard. Enter the operation name, select Next.  From the next screen select Operation : downloadReportDataChunk, select Next. From the Next screen Configure Headers (Non-Mandatory) and finish the wizard. 
  • Open the mapper and map the request parameters. 
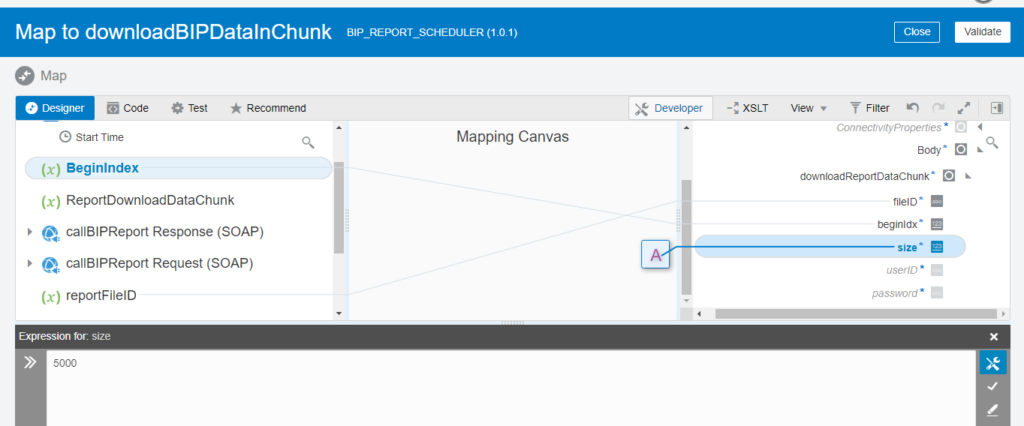
  • fileID: Report File ID generated by runReport operation. 
  • BeginIndex: It defines from where to start reading. Ideally it should be from 0. 
  • Size: It defines the size of data chunk to be downloaded in single call. It takes value in Kilo Bytes. 
  • downloadReportDataChunk operation will return reportDataOffSet and reportDataChunk. 

reportDataOffSet : It will define the last index fetched from BIP report data 

reportDataChunk: It fetches the report data in encoded format 

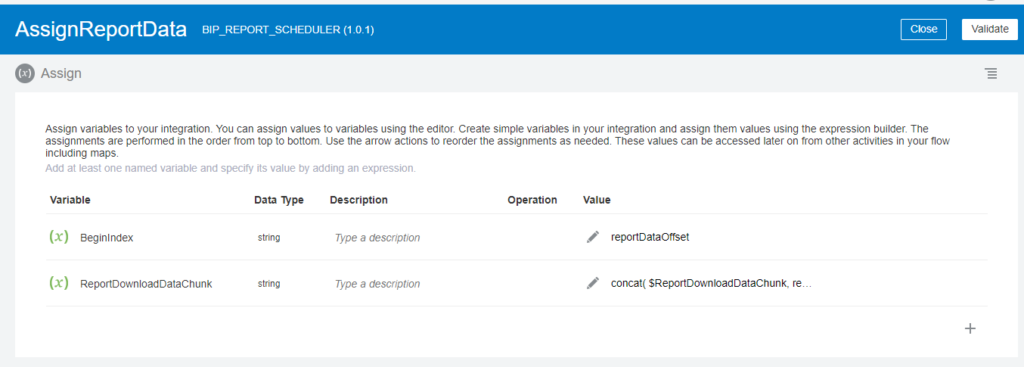
  • Assign Report Data and Report Offset to variable. 

While assigning Report Data chunk use concat function to append the data in ReportDownloadDataChunk parameter created in Step 1 and set Begin Index as reportDataOffSet. 

  • Every time While loop iterate it will check for BeginIndex, if there is no data to be fetch, downloadReportDataChunk operation will return reportDataOffSet as -1 which will satisfy loop condition and it will end the iteration. 
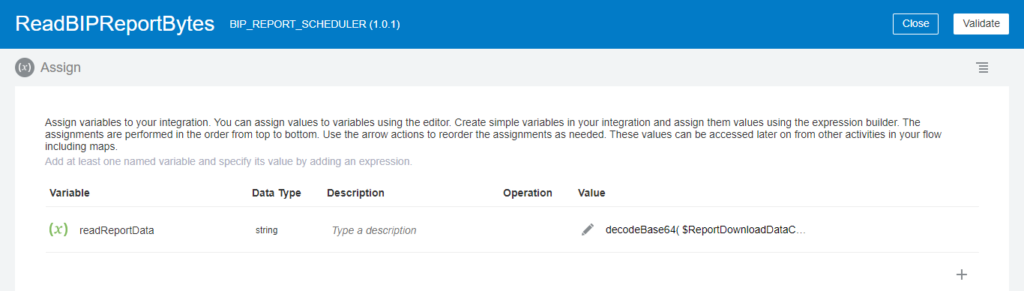
  • Now you have a final data in ReportDownloadDataChunk variable in encoded format. To decode the, create assign activity, add variable and use decodeBase64 function. 
  • Click validate and save your integration. Now you can activate and test your integration. 
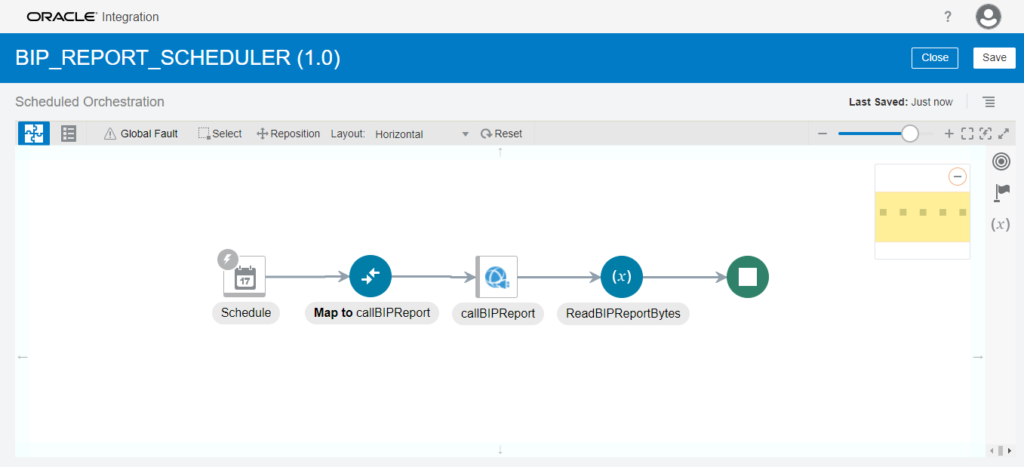
    This is how your Integration flow will look alike. 

BIP TO ATP Through OIC

BIP TO ATP DB Through OIC

Connections Required

v  SOAP Connection – External Report Web Service (WSS)

v  ATP DB Connection

Process Flow

step-1: Creating Integration for Running BIP Report

step-2: Create an Integration using Scheduled Orchestration                                                                                    


Ø  After selecting the schedule orchestration have to provide appropriate name then click on create.

step-3: Use the SOAP Connection to connect with the External Report WSS Service

step-4: Select the "Run Report" operation to call BIP Report

step-5: Configuring the Mapper here we need to pass information which necessary to call BIP  

Ø  Attribute Format: Defines the output format of the report.(XML\CSV)

Ø  Size of Data Chunk Download: Set to `-1` to retrieve the complete report data.

Ø  Report Absolute Path: Provide the exact path of the report along with the `.xdo` extension.


step-6: Establish an Stage File action [To convert Base64 data{Report Bytes} into Redable format]


Ø  Use “Write File” operation

Ø  Specify the file name and output directory for temporary storage

Ø  Select XSD Document {To convert data into redable format}

Ø  Upload Opaque Schema  by downloading below link           


save below content as OpaqueSchema.xsd file 


<?xml version = '1.0' encoding = 'UTF-8'?>  

<schema targetNamespace="http://xmlns.oracle.com/pcbpel/adapter/opaque/"

            xmlns="http://www.w3.org/2001/XMLSchema" >

      <element name="opaqueElement" type="base64Binary" />

    </schema>

Ø  automatically it will select the schema element


step-7: Again need to establish an Stage File action [To specify the particular structure to the file]


Ø  Use “Read Entire File” operation

Ø  Specify the file name and output directory {what ever we provided in the previous stage file action}

Ø  Choose Sample delimited document (e.g. CSV)

Ø  Here we need to choose which file we need to convert into redable format

Ø  Upload exported CSV File

Ø  As well as provide Record Name and Recordset Name

step-8: Configuring the mapper

Ø  Draw map between Report Bytes(Source) To Opaque schema(Target)

step-9: Use ATP connection [Autonomous Transaction Processing] to insert data into custom ATP tables


Ø  Select Perform an Operation On a Table[Based on requirement it will be change] among below options 

  1.      Invoke a stored procedure 
  2.      Run a SQL Statement 
  3.      Perform an Operation On a Table
  4.      Seselet AI for SQL 

Ø  Choose Insert To insert data into custom ATP tables 

Provide the table name what we gave in the SQL Developer [Name is casesensitive]

Ø  Select schema ADMIN [ It will be based on your connection details]

step-10: Configuring the mapper


step-11 : Provide business identifiers then save and active the integration


Step-12:run integration

and check the inserted data in the oracle SQL developer

Thursday, 11 September 2025

BIP Report Parameter options

 Reusable logics for report parameters

All option with multiple value selection in BIP Reports 


  and ((coalesce (null,:p_Period_Name) is null)

                          or (xah.Period_Name in(:p_Period_Name))

                          or 'ALL' in(:p_Period_Name)

  )

 and((coalesce (null,:p_ledger_Name) is null)

                          or (Gl.Name in(:p_ledger_Name))

                          or 'ALL' in(:p_ledger_Name)

  )

 and ((coalesce (null,:p_Segment1) is null)

                          or (Cde.Segment1 in(:p_Segment1))

                          or 'ALL' in(:p_Segment1)


FTP Connection Configuration

 FTP Connection Configuration 

Ccreate an FTP connection in Oracle Integration Cloud (OIC), select the FTP adapter from the Design > Connections section, then provide the host address, port, and credentials for the FTP or SFTP server, and use the connection within your integrations to read, write, or otherwise process files on the server.

In Oracle Integration Cloud (OIC), the FTP Adapter supports key operations like Read File, Write File, List Files, Move File, and Delete File to manage files on FTP/SFTP servers


Steps to Create an FTP Connection:
  1. Log into your Oracle Integration Cloud service. 
  2. Navigate to the Design sectionand click on Connections. 
  3. Click Createto start creating a new connection. 
  4. Search for "FTP"in the search box and select the FTP adapter. 
  5. Enter a namefor your connection. 
  6. Select the role(typically Invoke) for the connection. 
  7. Enter the FTP/SFTP Server Details:
    • Host AddressThe IP address or hostname of the FTP/SFTP server. 
    • Server PortThe port number (e.g., 21 for FTP, 22 for SFTP). 
  8. Provide Security InformationEnter the Username and PassPhrase (password) for connecting to the server. 
  9. Configure Optional Properties:
    • If connecting to an SFTP server, check the SFTP Connection option (often under Connection Properties) to "Yes". 
  10. Test the ConnectionClick the Test button to verify the connection details and ensure OIC can connect to the server. 
  11. Savethe connection once the test is successful. 
Using the Connection in an Integration: 
  • Once saved, the FTP connection can be used within your integrations as an invoke action to perform file operations like reading, writing, or transferring files.
  • The connection can be used for both FTP and SFTP servers, with the adapter handling the appropriate connection protocol based on your settings.

Gather below inputs from client

FTP Server Host Address

FTP Server Port

FTP Security Policy 

User Name 

Password


Under connections we can see newly created connection as shown in below snip

Also we can see the no of integrations are consuming these connections in below